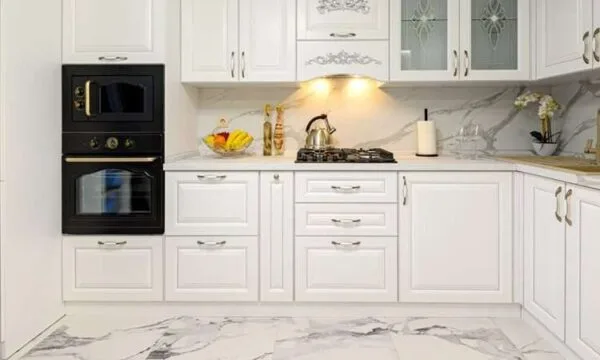
You’re in your gleaming Dubai kitchen, preparing a sumptuous feast for your family or guests. The aromatic spices are wafting through the air, and the sizzle of pans fills you with culinary excitement. But wait – what’s that grimy film on your kitchen hood? Is it casting a shadow on your otherwise spotless kitchen?
Fear not, dear Dubai homemakers! Today, we’re diving into the often-overlooked world of kitchen hood cleaning. Whether you’re a seasoned chef or a cooking novice, this guide will transform you into a kitchen hood cleaning expert. Say goodbye to grease, grime, and unwanted odors, and hello to a sparkling clean
kitchen that truly reflects the luxury and cleanliness Dubai is known for. Discover the secrets of kitchen renovators and kitchen cleaning companies, embrace the tricks, and revel in the satisfaction of a gleaming kitchen.
As kitchen hoods are important, they should be cleaned too. We have summarized some of the steps and tricks to help you out with kitchen hood cleaning.
Why Clean Your Kitchen Hood?
Before we roll up our sleeves, let’s talk about why keeping your kitchen hood clean is so crucial:
- Health and Hygiene: A dirty hood can harbor bacteria and mold, potentially contaminating your food and affecting your family’s health.
- Fire Safety: Grease buildup is a fire hazard. In the hot Dubai climate, it’s especially important to minimize any fire risks in your home.
- Efficiency: A clean hood functions better, removing smoke and odors more effectively, keeping your kitchen fresher.
- Aesthetics: Let’s face it – a sparkling clean hood looks fantastic and elevates your entire kitchen’s appearance.
- Longevity: Regular cleaning extends the life of your hood, saving you money in the long run.
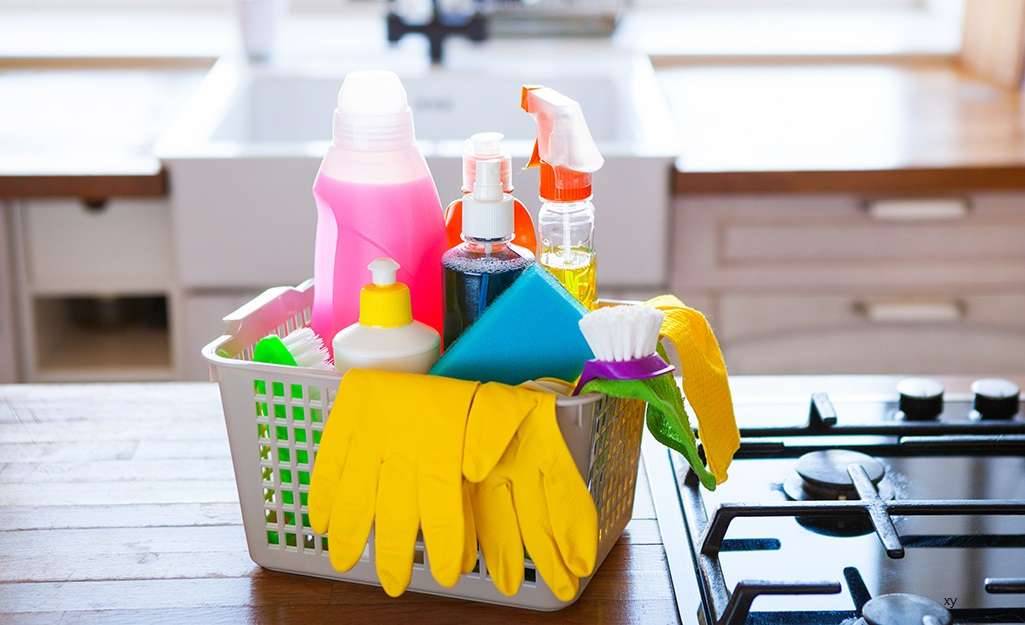
What You’ll Need:
- Degreaser (choose an eco-friendly option if possible)
- Warm water
- Dish soap
- Microfiber cloths
- Soft-bristled brush or old toothbrush
- Rubber gloves
- Step ladder (if needed)
- Bucket
- Aluminum foil or plastic wrap
- Screwdriver (for removing filters)
Kitchen Hood cleaning steps:
The kitchen hood system needs filtration after some time. Here are some of the steps that’ll help you do the job.
Safety First:
Before we begin, let’s cover some important safety tips:
- Always unplug your hood or turn off the circuit breaker before cleaning.
- Ensure proper ventilation by opening windows or using fans.
- Wear rubber gloves to protect your hands from harsh cleaning agents.
- If using a ladder, make sure it’s stable and have someone spot you if possible.
Step-by-Step Cleaning Process:

- Prepare Your Kitchen: Start by clearing your stovetop and covering it with aluminum foil or plastic wrap. This will protect your cooktop from drips and make cleanup easier. Remove any items from nearby countertops to give yourself ample working space.
- Remove the Filters: Most hoods have removable filters. These are typically made of metal mesh or baffle-style filters. Carefully remove these – you may need a screwdriver for some models. If you’re unsure, consult your hood’s manual or look up the model online.
- Soak the Filters: Fill your sink or a large bucket with hot water and add a squirt of dish soap and a cup of baking soda. Submerge the filters in this solution and let them soak while you clean the rest of the hood. For extremely grimy filters, you might want to let them soak overnight.
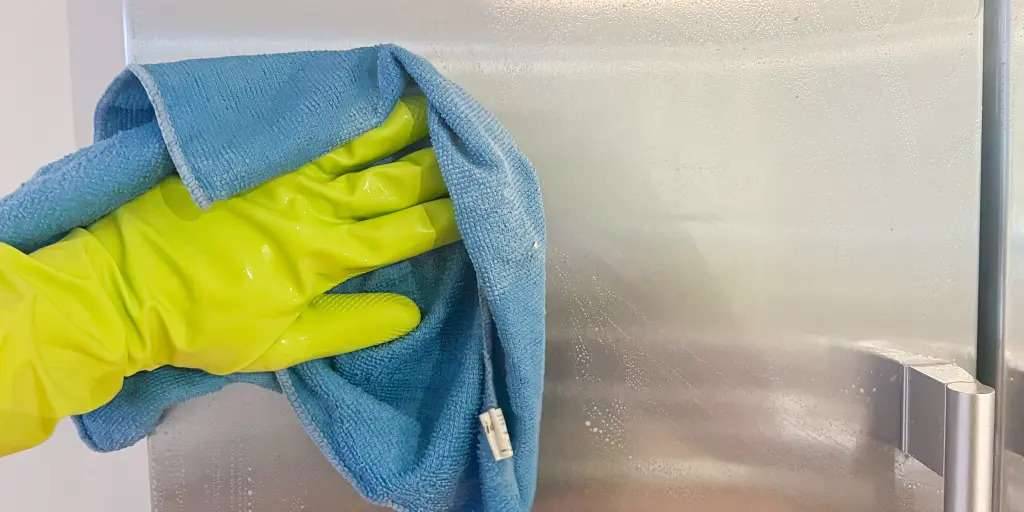
- Clean the Hood’s Exterior: Mix a solution of warm water and gentle dish soap. Using a microfiber cloth dipped in this solution, wipe down the exterior of the hood. Pay special attention to the underside, where grease tends to accumulate. For stubborn spots, use a soft-bristled brush or an old toothbrush. For stainless steel hoods, which are popular in Dubai’s modern kitchens, remember to wipe in the direction of the grain to avoid scratches. After cleaning, use a clean, damp cloth to remove any soap residue, then dry with a fresh microfiber cloth to prevent water spots.
Tackle the Hood’s Interior:
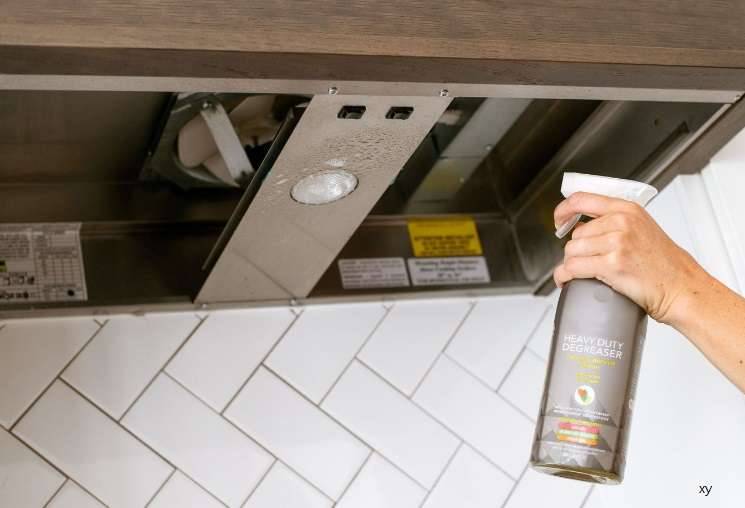
Now, let’s address the inside of the hood – often the grimiest part:
- Spray the interior with your degreaser, ensuring full coverage. Let it sit for a few minutes to break down the grease.
- Use a microfiber cloth or soft sponge to wipe away the loosened grime. For stubborn areas, employ your soft-bristled brush.
- Pay extra attention to the fan blades and other nooks where grease likes to hide.
- After scrubbing, wipe everything down with a clean, damp cloth to remove residue.
- Dry thoroughly with a fresh microfiber cloth to prevent rust.
Clean the Filters
By now, your filters should have soaked long enough:
- Scrub each filter gently with a soft brush to remove loosened grease and grime.
- Rinse thoroughly under hot water until the water runs clear.
- For persistently dirty filters, you may need to repeat the soaking and scrubbing process.
- Once clean, shake off excess water and let the filters air dry completely.
Reassemble and Polish
- Once everything is dry, reattach the clean filters.
- Give the exterior one final wipe-down for a perfect shine.
- Remove the protective covering from your stovetop and clean any fallen debris.
Congratulations! Your kitchen hood should now be sparkling clean.
Maintaining Your Clean Hood
Now that your hood is pristine, let’s talk about keeping it that way:
- Weekly Wipe-Down: Make it a habit to wipe the exterior of your hood weekly with a damp microfiber cloth. This prevents buildup and makes deep cleaning easier.
- Monthly Filter Cleaning: Aim to clean your filters at least once a month. If you cook frequently or use a lot of oil in your cooking (as is common in many Middle Eastern dishes), you might need to do this more often.
- Deep Clean Every 3-6 Months: Mark your calendar for a thorough cleaning every 3-6 months, depending on your cooking habits.
- Use Your Hood: Always turn on your hood when cooking. It’s not just for looks – it helps remove grease particles from the air before they can settle on surfaces.
- Address Spills Immediately: If you notice any grease splatters or food particles on your hood, wipe them away promptly to prevent hardening.
Pro Tips for Dubai Homemakers
- Beat the Heat: In Dubai’s hot climate, grease can become sticky and harder to clean if left too long. Regular cleaning is even more crucial here than in cooler climates.
- Choose the Right Products: Look for cleaning products that can handle tough grease but are gentle on surfaces. Many eco-friendly options are available in Dubai’s supermarkets.
- Mind the Moisture: Dubai’s humidity can sometimes cause metal parts to rust. Always dry your hood thoroughly after cleaning.
- Professional Help: For very large or complex hood systems, or if you’re short on time, consider hiring a professional cleaning service. Many reliable options are available in Dubai.
- Upgrade Wisely: If you’re in the market for a new hood, consider models with easy-to-clean surfaces and dishwasher-safe filters. Some high-end models even have self-cleaning features!
Troubleshooting Common Issues
- Persistent Odors: If your hood still smells after cleaning, try leaving a bowl of white vinegar in it overnight (with the fan off). The vinegar will absorb lingering odors.
- Discoloration: For stainless steel hoods with stubborn discoloration, a paste of baking soda and water can work wonders. Apply gently and always test in an inconspicuous area first.
- Scratches: Minor scratches on stainless steel can often be buffed out with a specialized stainless steel cleaner. For deeper scratches, consult a professional.
- Faulty Fan: If your fan isn’t working efficiently after cleaning, ensure nothing is obstructing the blades. If the problem persists, it might be time to call a technician.
Frequently Asked Questions (FAQs)
Q: How often should I clean my kitchen hood?
The exterior should be wiped down weekly, filters cleaned monthly, and a deep clean performed every 3-6 months, depending on your cooking habits.
Q: Are self-cleaning hoods worth the investment?
Self-cleaning hoods can save time and effort, especially for frequent cooks. However, they’re typically more expensive and may still require some manual cleaning for optimal performance.
Transform your kitchen from lackluster to lustrous with our guide to kitchen hood cleaning. Armed with the right tools, a dash of elbow grease, and a sprinkle of cleaning magic, you’ll unveil a kitchen hood that not only functions flawlessly but also shines as a beacon of cleanliness in your culinary kingdom. Happy cleaning!
Tackle the Hood’s Interior